Friday, May 30, 2008

DT reveal for MAY!!!

Here we are again... time for our monthly Design Team reveal. This months theme?? ALTERED ART! And, WOW, can I say that we have some talented altered artists on our Design Team... wait until you see what they have created!

KAY made this awesome hanging picture display, kind of a piece of 3D scrapbook wall art! She used the just awesome WRMK Frenzy line of papers and embellies and the cool Maya Road owl stamp! Love this Kay, you rocked this project, love all the little fun details and the awesome bright colors!!


DEBBIE made this awesome mini book for a gift for her Father celebrating 25 years of sobriety... how touching and beautiful it is. I love how she used the Dream Street CLUBHOUSE line of papers throughout the entire album, really gives it a unified look. She started with this awesome Scenic Route album... Such a cool project Debbie... and your stamping is so awesome! Among the stamps that Debbie used throughout were this set of Basic Grey Journal Swash stamps, obviously useful for so much more than just journaling, this Autumn Leaves Barcode set, and a versatile set of Autumn Leaves Flourishes. This is just a sample of the pages in this book. To see the whole album, be sure to check out the Allyscraps Gallery! Debbie, thanks for sharing this with us.


MORAG altered this super sweet and adorable baby hanging frame with the pretty new Basic Grey SUGARED line of paper and embellishments. She started with this really cool scalloped
Maya Road chipboard album and all of the little details she added are just so perfect. Awesome job Morag, love that it is just SO girlie!


TRISH chose to make an altered picture frame and WOW, it's so pretty! I love the kites and the beautiful 3D flowers.... just adorable! Isn't this paper (and the die cuts too), the HONEY PIE line from Cosmo Cricket so pretty and soft? She used these cute Heidi Swapp letters too. What a special gift for your sweet daughter, thanks for showing it to us!


KARY was busy with distressing and she made this gorgeous wall hanging with this beautiful prom picture of her daughter. Wow, the texture and dimension is just stunning. This will be a treasured memento for her I'm sure! Kary used papers from Melissa Frances and KI Memories to really jazz up her frame. I love all the additions on the frame and the pretty lace too. Awesome job Kary!


OK... so I am no alterer... so I chose to make a dimensional layout instead. I used the gorgeous paper and die dut embellies from Pink Paislee's SPRING FLING line, and the cutest ever chipboard tree from Maya Road! Thanks for taking the time to check our our projects today...


Hope to see you all soon over at the AllyScraps store, message board and gallery!
~ Dana

Tuesday, May 27, 2008

Playing with Paper

What can you do with all your leftover scraps of patterned paper? If your like me, you always have a large pile of scraps left from layouts, and you just can't bear to throw them away! Heres a little tip to inspire you to give those scraps a 2nd look, and "play with your paper" in a new way.

Photobucket
These are leftover scraps after creating my first layout. The large green piece would work great as a photo mat but doesn't leave much else to work with. Instead, I cut along the patterned lines of the green pp and created several smaller pieces.
Photobucket
Next, I played with these pieces by cutting and pleating them to create new elements to work with. Imagine how different your scrap paper would look by folding it!

Photobucket

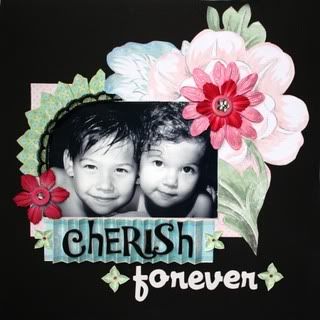
This is the finished layout, "Cherish Forever". Created by using just a few pieces of leftover paper! All the patterned paper is from the Melissa Frances Ambiente Collection. I love how this paper pops on the black cardstock! So, what are you waiting for? Pull out that pile of scraps and start "playing with your paper!". Scraps aren't just for matting anymore!


~~Kay

Friday, May 23, 2008

New Sketch Challenge!

So are you up for a new Sketch Challenge? Not only is it a great place to find inspiration for your layout, but it's a super-easy way to earn a chance at a $10 gift certificate prize each month! Just create a page based on the latest sketch, upload it in the gallery and link it to the Sketch Challenge Thread on the forum before the deadline, midnight on Thursday June 5. You can use the sketch multiple times - every page completed by the deadline will earn a "name in the hat" for a random drawing for the May prize!

So get busy! Here's the sketch!


And here is my page, {perfect?} zoo weather, featuring We R Memory Keepers "Explore" line. I just love the colors and patterns in this line! The coordinating chipboard embellies worked great on this page, too.


I have to make a confession. When I first saw this paper line, I wasn't so sure what the thinking behind the papers that have 4 "blocks" of "mini-papers" on the back side was - for example, 360. But, I have found that they are very versatile! On this page, I used the yellow block to print my journaling. I also have a page in the gallery using the WRMK Frenzy line ("building pride"), where I hand-cut the swirl design from one of the blocks on the back of Euphoria to dress up my journaling. There are so many ways to use these! I would love to see what your ideas are!

-- Debbie

Friday, May 16, 2008

Here's a little technique to use with your chipboard

One of my favorite techniques is painting and distressing chipboard. This just adds an extra "WOW" factor to your layouts, and you just can't go wrong with that!! So, on that note, I'm going to share one of my super easy techniques with you. Get your supplies out and ready to go!! You'll need paint, a sponge applicator, a small paintbrush (the kind you watercolor with), a pen to "doodle" with, and, of course, your chipboard!


Once you have the chipboard you want to use, lay it on a flat surface that you don't mind getting a little messy:


Choose the paints that you want to use as your base color--for mine, I chose a soft pink from Making Memories. Using a sponge applicator, generously paint the chipboard, being sure to also get the sides painted:


Let your chipboard dry, usually about an hour--now, you can leave your chipboard as it is, or continue on with a little added texture to it--this step is really fun and super easy to achieve--using a pen (in my case, I chose black, but any color you chose would look great!!), doodle along the edges of the chipboard--you can use continuous lines or a "stitching" effect---


Once the doodling is done, take your second color of paint (in my case, I am using a soft cream color) and simply dab a little bit of contrasting color onto a paper plate or paper towel--taking your paintbrush, just get the tips of the brush wet and wipe most of it off onto your paper towel--you want almost all of the paint off of the brush--then start dabbing the brush onto the chipboard randomly--remember that you want less of this color on the chipboard (kind of like a sponging technique).


Adding paint and texture to your chipboard elements is a really cool way to add just a little more "oomph" to your layouts--don't be afraid to get a little messy with your chipboard!!

Have fun creating!!

~~Kary

Wednesday, May 14, 2008

Say Hello to Cogsmo

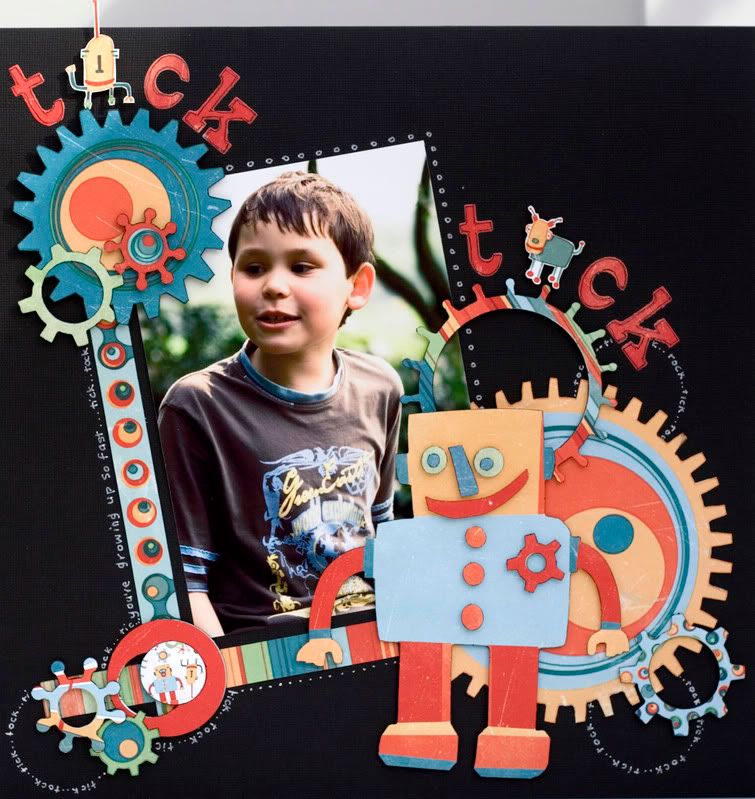
Cosmo cricket have always been renowned for their great scrapbooking products. Cogsmo is a funky robot full of bright, cheery colours and so much fun to use


The fun die cuts and papers look gorgeous against the black cardstock.


I've hand cut some of the cogs and used others from the die cut sheet. Of course Mr Roboto himself is popped straight from the die cuts.


To add more depth, I've used white pen to create circles of text (tick... tock...) here and there.


Watch out tomorrow for my little door plaque featuring more Cogsmo!

Morag x

Friday, May 9, 2008

Tomorrow is the BIG DAY! Our NSD+7 online crop!

Still feeling SCRAPPY a week after National Scrapbook Day?? Well, we are too! So, come on over to AllyScraps for our NSD + 7 online crop on Saturday, May 10th from 2-8 EST. We will celebrating our brand new forum and our love of all things scrapbook with hourly scrapbook challenges, tons of games, BINGO and loads of prizes too. We hope that you will join us for lots of fun, a chance to meet some new scrappy friends and a whole lot of inspiration. See you there!

Monday, May 5, 2008

Teresa Collins JOURNAL IT!


When I got the Teresa Collins JOURNAL IT collection in the mail from AllyScraps, it was so much cooler then I expected. Two sided papers, lots of fun journaling blocks of all sizes. I couldn't wait to start making a page with it! My page is real life scrapbooking... the big trauma my daughter has passing on her things to others (even when she has WAY outgrown them). She hates this layout, but I think will appreciate it when she gets older. (I hope so anyway.)


Patterned papers are the Journal It line, including the cool calendar block! Glittery letters are American Crafts Roller Rink thickers and the book plate and heart and Heidi Swapp.


THanks so much for taking a look!
~ Dana


Thursday, May 1, 2008

GLITZ "Sublime" collection is here!!


I just got it and have had the most fun creating a funky layout "CRAZY GOOFY MINE"--I handcut the flowers from the "Doodly Floral" papers and layered them with pop dots onto the "Splatter"
paper. I also used "Wacky Stripe" and "Sublime Journaling" as accent papers--the best part of the "Glitz Collection" is the fact that each piece is double-sided--so it's like getting two pieces of patterned paper for the price of one!! I used the backsides of the collection to mat my photos and create journaling tags--

Have a little fun with this collection!! I guarantee you will love it!!

~~Kary