Thursday, July 30, 2009
Welcome to the Blog Hop with Adorn It!
We've teamed up with Adorn It to celebrate Summer!
The design team have been really busy cooking up some wonderful projects in celebration of Summer and all things colourful.
Let's start with a really sweet project from Rae.
Rae has used the very pretty, vibrant Doodlebug papers to create these gorgeous sweet gifts. The colours are just divine and the sticker accents add a touch of sparkle.
How about a mini-book of the boys in your life? Deb has created this adorable album using the Maya Road Dinosaur album.
Deb says: "I decided to use the “backs” of the dino pages upside down, so that you could open it up and look at the two pages together, like a typical 2-page spread.
The pictures our from our outing last December to see the stage production of “Walking with Dinosaurs”. The pictures aren’t the greatest, since they were taken from far away in a large arena setting, but I really wanted to scrap these because it was such a cool show!"
Having a party this summer? Why not take a leaf out of Chris' book and create a centre-piece for your table?
I love the way Chris has used an eclectic mix of chipboard shapes and embellishments as a base, before decorating them.
Dana has created a stunning layout featuring her daughter - she looks a pleased as punch! Dana has a real knack of mixing patterned papers and embellishments together so beautifully.
For me, I have created a mini-book in the shape of a beach bag. The gorgeous Girl Friday papers from Cosmo Cricket are perfect for all sorts of occasions.
The flip-flops were hand cut from chipboard - I just love the way the poke out of the top of the bag!
A simple concertina fold holds the pages and covers together. You can add as many pages as you wish using this technique.
I love these Felties from Sassafras!
Christina Smith is next on the hop, check out her blog here http://pawsscrappincorner.blogspot.com/
Well, I hope you've enjoyed hopping with us! If you'd love to see more pictures or chat to the designers, why not hop on over to our Forum where there is plenty of chatter, inspiration and fun and games. And to continue on the blog hop
AllyScraps always carries a huge range of the latest products. Shipping is only $4.95 for ANYWHERE in the USA and International shipping is available on request.
Hope you'll be back soon.
Morag x
Friday, July 17, 2009
Bo Bunny's Love Shack
With Summer in full swing, it's time to brighten up our albums with gorgeous prints of long hot summers.
Bo Bunny's Love Shack line has beautiful, rich colours without being over-powering.
I used Funky as my base and made the most of the frame pattern by cutting and peeling away one corner.
To draw attention to the photos, I've layered Shake and the stunning Party papers which I've edged with a lace punch.
The stunning flowers come in a brilliant range of colours and sizes. I've 'frosted' them using my glitter technique (see previous post) but adding buttons and brads.
I've tucked in a tiny envelope and note to hold the journalling.
Whilst you're browsing around the store, check out 4 new kits containing a themed range of papers and matching embellishments. *sigh* Divine.
I hope that I've inspired you to add a little sunshine to your pages!
Morag x
Friday, July 3, 2009
Fancy Magazine Holders
I have a super easy project for you today!! Dress up those plain boring magazine holders with some pretty scrapbook paper and ribbon.
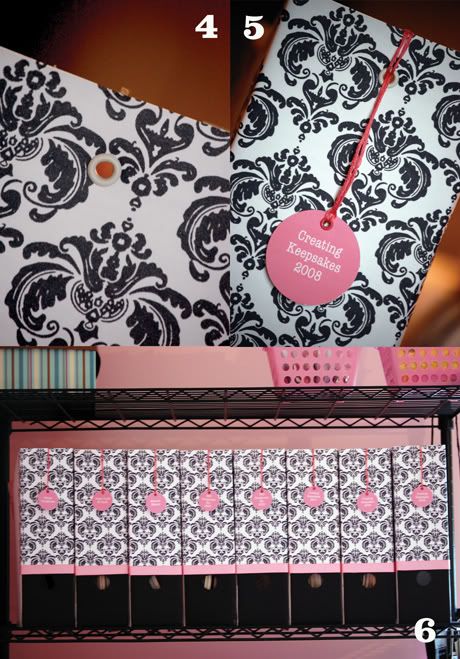
I purchased my plain white magazine holders from Ikea. They were only a couple of dollars and came in a pack of 5. I needed to make 8 to go across my shelf in my scraproom. If you are on a tight budge, try using a cereal box. Just cut it on the diagonal.
First I picked out some scrapbook paper that I wanted to use. I only decorated the backs because that is all that you will see on my shelf, but feel free to wrap your paper the entire way around. Rather than Modge Podge, I used Yes! Paste. Use whatever adhesive you prefer.
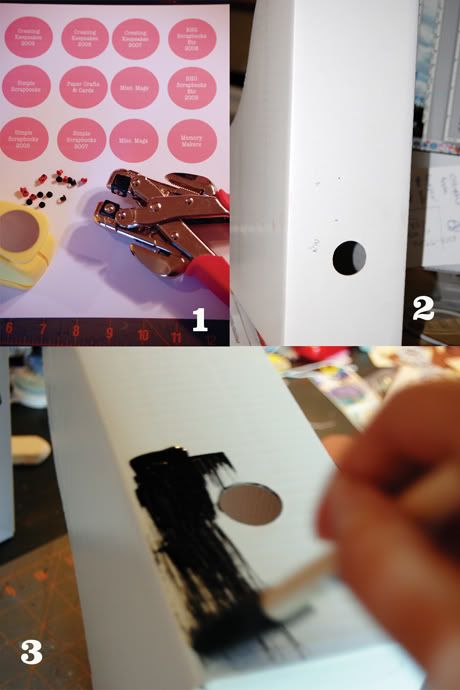
Step 1: Tags. I made some circle tags in pink on my computer, then punched them out using a 1 1/2" circle punch. You can just use a color coordinated cardstock and some rubon letters if you prefer, or just hand write on your label. I punched a hole at the top of each tag and added a mini eyelet in pink. I used a 10 inch piece of embroidery thread, folded in half, tied into a loop, then attached to the tag.
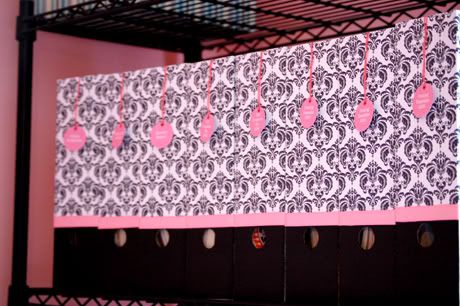
Step 2. On the bottom 1/3 of my holder, I used black paint to go with my pink, black and white theme. You can use another patterned piece of paper on this step if you like, or just go with one full sheet... it's completely up to you. I painted first as to not mess up my patterned paper. Skip this step if you are not using paint.
Step 3. Next, I measured where I wanted my paper to go, trimmed the paper then adhered the sheet to the magazine holder. I then cut a piece of 3/4" wide pink ribbon and adhered that on top of my paper seem. (see below)
Step 4: Put a larger eyelet into the top center of your magazine holder. I used white to kind of make it disappear.
Step 5: Loop your tag thru the eyelet... you are now finished!
Step 6: Repeat, then fill your pretty magazine holders and put them on your shelf.
Now, doesn't that look better than plain boring magazine holders?
Have a great weekend, and Happy 4th of July.
Chris