Wednesday, September 29, 2010

Play banner!

This adorable "PLAY" banner from Cari Fennell is so much fun. I especially like that you could adjust the design easily to spell out any word that you like. Love all the ribbons and the vintage details.


Instructions
Using the Maya Road Banner set, I painted the scalloped pieces to match the color scheme of the October Afternoon papers I used. The plain panels were covered in different patterned papers from the Fly A Kite paper line.
I punched out large circles and placed them in the centers of the banner panels. I painted chipboard letters and placed them in the circle centers. I cut off the envelope flaps from the Maya Road Kraft envelope sets. I glued them to the back of each panel and decorated with lace, vintage buttons, pins and flowers. I added little strawberry accents that matched the papers perfectly. All of the panels are connected with brown pink polka dotted ribbon. I also added little pieces of ribbons tied in knots on the ends. I just love how this came together and I plan to give it to my son's teacher as a gift for her classroom.


Supplies
Maya Road chipboard album, pennant
Maya Road felt badges, fruit
Maya Road kraft envelopes
Maya Road resin blossoms, cream
October Afternoon, Go Fly a Kite papers - strawberry jam, front porch, sprinklers

Thanks SO much Cari, we love this project. :)

Ready for the AllyScraps October sketch contest?? Well, you'll have to check back on Friday to see all the latest details. We have a special guest artist, and WOW, wait until you see the prize. See you Friday.

~ Dana

Monday, September 27, 2010

Life is Good mini album

In all my time at AllyScraps, I've had the pleasure to post amazing works by so many wonderful women on this blog. Truly gorgeous projects every week. This is one of my very favorites, beautifully simple but engaging on EVERY page. Check out Roree Rumph's Life is Good mini album, you'll be amazed.


Instructions:
Cover

1. Paint the chipboard cover with off-white acrylic paint, multiple coats, and let dry.
2. Hand stitch each plank on the chipboard cover with off-white embroidery thread.
3. Adhere the cardstock sticker for the title to the chipboard cover with 3-d foam adhesive.
4. Cut out flowers and leaf shapes from patterned paper, and distress the edges with a file. Layer the leaf shapes, flowers, and buttons, and adhere the flowers to the chipboard cover.
5. Punch two holes on the right plank of the chipboard cover. Thread ribbon through the holes, then thread again, and knot and trim each end.


Page 1
1. Cover the chipboard page with patterned paper, and distress the edges with a file.
2. Apply the cardstock and letter stickers to the page.
3. Cut out two cloud shapes from patterned paper. Hand stitch both shapes with off-white embroidery thread. Layer and adhere the clouds to the page.
4. Cover the chipboard heart with patterned paper, add a cross stitch with blue embroidery thread, and adhere the heart to the page.


Pages 2-7
1. Cover the chipboard page with patterned paper, and distress the edges with a file.
2. Adhere 2 3/4 x 4" photo to the page.
3. Adhere a 5 3/4" strip of striped patterned paper to the page.
4. Adhere the cardstock and letter stickers to the page.
5. Cut out flowers and leaf shapes from patterned paper, and distress the edges with a file. Layer the leaf shapes, flowers, and buttons, and adhere the flowers to the page.
Assemble the album with binder rings.

Supply List:
Maya Road picket fence chipboard mini book
Echo Park Paper Life Is Good Collection, Floral Dress
Echo Park Paper Life Is Good Collection, Brown Floral
Echo Park Paper Life Is Good Collection, The Neighborhood
Echo Park Paper Life Is Good Collection, Simple Stripes
Echo Park Paper Life Is Good Collection, Bold Stripes
Echo Park Paper Life Is Good Collection, Seeing Spots
Echo Park Paper Life Is Good Collection, Set The Table
Echo Park Paper Life Is Good Collection, Happy Borders
Echo Park Paper Life Is Good Collection, Elements
Echo Park Paper Life Is Good Collection, Stickers
October Afternoon Fly A Kite Collection, Picnic Table
October Afternoon Fly A Kite Collection Word Stickers
Jenni Bowlin Collection, Vintage Style Sew-On Buttons, Orange
American Crafts Thickers, Poolside Grapefruit
American Crafts Thickers, Poolside Blue

Thanks so much Roree. I'm inspired! Dana

Sunday, September 26, 2010

I love Echo Park Paper Co.!!!

Hi everyone. Guess what?! I have been scrapping! After doing 2 layouts ALL summer, I have done about 25 in the last month. :) (That includes the 12 I did on my scrappy weekend away.) Glad to have my scrapping mojo back.

Lately I've been really drawn to the brand new manufacturer Echo Park Paper Co. I LOVE every single one of their new lines, and I've been SO inspired to use them. This first layout uses their Life Is Good line, it's called the squirrel vs. the birthday cake.


Supplies
Journal Cards (back)
Happy Borders
Set the Table (back)
Simple Stripes
Seeing Spots (back)

The second layout uses the Walk in the Park line. This is my very favorite line, check out my winter crocs layout.


supplies
Picnic Fun
Element Cards
Sticker Elements
Sticker Alphabet
Playful (back)
Mother Nature

Cathy just put up 2 brand new Christmas lines too, I cannot wait to get them in the mail.

Hey, We just chose 2 of our blog commenters to win a prize from AllyScraps. Congrats to Erika M and Nancy aka Homesclscrapper!! They will soon be receiving a fun scrappy prize. :) YOU could be next, so please keep leaving us your super kind comments.

I'll be back very soon, with lots of new projects, so check back soon. Have a great week.

~ Dana

Friday, September 24, 2010

September sketch contest winner PLUS a bonus sketch!

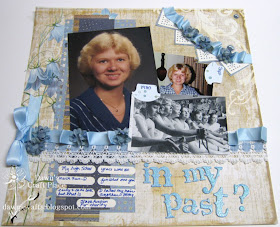
Let's give a big hurray and congratulations to Dawn Lotharius for her wonderful layout "in my past", she is the winner of the September sketch contest! We had so many wonderful entrants again this month and as always, it's such a tough decision to choose one winner. But don't worry, if you didn't get to it this month... there will be a brand new contest on October 1st.


Here's Debbie Gaydos' wonderful sketch that started it all!


And, the super cute prize from We R Memory Keepers. Such a cool fall card kit (Maple Grove), enjoy it Dawn!


Here's a big bonus for you.... another wonderful sketch from Debbie for you this month. Hope it will inspire you to get moving on a fresh new layout.


We have some great upcoming events here at AllyScraps. First of all, don't forget that your comments on our blog count! I will be choosing a winner or TWO from this weeks blog comments to win a fun little scrappy prize. :) Love that! I have projects coming up from Cari Fennell, Roree Rumph and I've been scrapping too, can't wait to share. AND, I just received in my inbox, the exciting October sketch contest sketch from none other than Becky Fleck, who will be a guest designer here for October. Looking forward to some awesome inspiration in the next few weeks.

Enjoy your day! Dana

Wednesday, September 22, 2010

"Autumn" Gift Box set

Hi everyone, Linda Albrecht is back this week with an adorable and festive "autumn" gift box set. It's a set of stacked boxes for fall. The bottom one holds ten- 5" square cards and the top one is for candy, etc. Super cute as a decoration, but super functional too. Love it!


Instructions
1. Cover 2 decorative boxes with patterned papers, tops and bottoms.
2. Adhere ribbon around the smallest box bottom then thread a large button with jute string and adhere to the ribbon in the cetner of one of the box sides.
3. Paint a face on a small styrofoam pumpkin then set aside to dry.
4. Cut a 1.5" x 12" strip of patterned paper, accordion fold at 1/4" intervals then glue into a circle onto the top of the smallest box. Adhere the pumpkin on to the center of the accordion folded circle. Adhere artificial fall berries to each side of the pumpkin.
5. Make a hat for the pumpkin from patterned paper by cutting a large half circle out of the paper that measures 4" from top to bottom of each side.
6. Form the cone shape for the hat from the half circle then adhere one side edge to keep shape. Attach large brad and a velvet Pleat flower to the center of the hat then adhere a ball (pom pom or other round shaped object) to the top tip of the hat.
7. Adhere the hat to the top of the pumpkin then add trim to hide the paper edge.
8. Paint a chipboard frame from the Framed Font yellow, apply clear glitter and adhere a piece of patterned paper to the backside to fill in the opening of the frame.
9. Adhere the frame to the bottom front center of the largest box, add "autumn" word with chipboard stickers, add brad and buttons and other desired embellishments.
10. Cut ten- 5" x 10" pieces from various colored cardstock to match patterned papers then fold them in half to make 5" square cards. NOTE: My box holds 5" square card perfectly, but you could make your cards to fit inside whatever size box you use.
11. Cut ten- 5" squares from various patterned papers to use as the background for the front of each card.
12. Layer each base with other small pieces of patterned papers, labels and tags (cut from the Cosmo Cricket Nutmeg "Elements" paper and Cosmo Cricket Togetherness "Elements" paper) and stickers. NOTE: Make sure to use the fluid chalk inkpad on the edges of all pieces before adhering to card base.
13. Machine sew stitching or add rub on stitches then adhere remaining embellishments such as buttons, brads, chipboard, pearls and Pink Paislee Artisan Elements (artisan elements in my samples are sprayed with a yellow Glimmer Mist.)
14. Add clear glitter to various places on the cards to add sparkle. Add small pearls to some of the button centers, if desired.
15. Adhere completed card fronts to the front of folded cardstock base.


Supplies:
Cosmo Cricket Togetherness, Reunion paper
Cosmo Cricket Togetherness, Pinwheels paper
Cosmo Cricket Togetherness, Birds of a Feather paper
Cosmo Cricket Togetherness, Elements paper
Cosmo Cricket Togetherness, All a Flutter paper
Cosmo Cricket Nutmeg, Elements paper
Cosmo Cricket Togetherness, Making Plans paper
Cosmo Cricket Togetherness, Borders paper
Cosmo Cricket Nutmeg, Maple paper
Cosmo Cricket Nutmeg, Acorn paper
Cosmo Cricket Cardstock Stickers, Nutmeg
Pink Paislee Queen Bee Brads
Pink Paislee Artisan Elements Swirls
Melissa Frances White Ribbon
Melissa Frances Thankful Transfers
Maya Road Red Scallop Dot Ribbon
Maya Road Yellow Scallop Dot Ribbon
Maya Road Velvet Pleats, Sky Blue and Turquoise
American Crafts Thickers, Nutmeg
Tattered Angels Framed Fonts, Regal
Little Yellow Bicycle, Clothesline Collection Rub Ons, Stitches
Colorbox Ink Cats Eye Fluid Chalk Inkpad, Chestnut Roan

Wow, those cards are pretty too!!! Thanks so much Linda, you're the best. :)


Hey, while I'm thinking of it... Cathy has decided to do a little blog giveaway. A couple of times a month, we'll be doing random giveaways chosen from the people who comment on the projects on our blog! So, give leave some comments for the lovely designers we have here at AllyScraps, and you might just win a fun scrappy prize!

Have a great week, Dana

Monday, September 20, 2010

A mailbox full on inspiration.

Hi all! I just got back from a weekend of scrapping with my best scrapping buddy Karlyn... and my mailbox was full of awesome projects from the fabulous designers that we are SO lucky to have here at AllyScraps. I'm so looking forward to sharing them with you this week, along with a layout I made and the September sketch contest winner. I have a bonus sketch for you too! So, be sure to check out the blog a lot this week, it will be loaded!

When I asked Roree Rumph to guest design for us, I new she was super talented... and I couldn't wait to see her projects, especially her gorgeous cards. She has really wowed me with this one! Take a look.


Instructions:
1. Paint six of the scalloped pendant chipboard shapes with off-white acrylic paint, 3-4 coats. Let dry.
2. Make a 5 1/2 x 5" card from a coordinating cardstock.
3. Cover the card front with the light blue patterned paper. Distress the edges with a file.
4. Cut the blue patterned paper to 4 1/4" square. Distress the edges with a file, and adhere the panel to the card.
5. Cut the graph patterned paper to 1 x 4 1/4". Distress the edges with a file, and adhere the panel to the card.
6. Cut the striped patterned paper to 1/4 x 4 1/2". Distress the edges with a file, and adhere the strip to the card.
7. Gently bend the edges of the pendant chipboard shapes, so that the they curl up slightly. Layer and adhere the shapes in a circle to the card front. (The pendant circle size will be around 4 3/4".)
8. Cut out a 2 3/4" circle from scrap cardstock. Punch ten 1" circle from the pink patterned paper, distress the edges with a file, and layer and adhere the punched circles around the oustide edge of the larger circle to create a flower. Gently bend the punched circles so that the curl up slightly.
9. Adhere the pleated ribbon around the inside edge of the pink flower.
10. Layer the heart, rectangle and arrow cardstock stickers on the round label sticker. Sew on the button with pink embroidery thread, and add cross stitches at the corners of the rectangular cardstock sticker. Adhere the finished label sticker to the center of the pink flower with 3-d foam adhesive.
11. Adhere the finished pink flower to the pendant chipboard flower with 3-d foam adhesive.
12. Adhere the "happy" cardstock sticker to the card front with 3-d foam adhesive.


Supplies
October Afternoon Thrift Shop, The Great Find
October Afternoon Fly A Kite, Lemonade
October Afternoon Fly A Kite Label Stickers
Jenni Bowlin Collection, Orange buttons
Echo Park Life Is Good, Bold Stripes
Echo Park Life Is Good, happy borders
Echo Park Life Is Good, sticker elements
Echo Park Life Is Good, floral dress
October Afternoon Fly a Kite, word stickers
Maya Road, mini chipboard banner
Maya Road, cream pleated ribbon

This is just beautiful Roree, thank you SO much!

See you all soon, have a great week. Dana

Friday, September 17, 2010

September SKETCH contest reminder!

Hey, don't forget about our September sketch contest, here at AllyScraps!! You get to work with this awesome sketch from Debbie Gaydos. Hope you're working on your entry right now!


Of course, I used Debbie's sketch right away! I made this super easy layout, using the Echo Park Happy Halloween collection. This paper is SO cute, and perfect for all your ghostly layouts and Halloween projects. I especially liked using the fun sticker elements. Did you notice how I used the sketch for inspiration, but didn't follow it exactly? Instead of putting it at the top, I incorporated the banner into my title. I put my 3 photos in a line instead of where they were on the sketch, and I moved my title too. I find that sketches are a great way to get my project started quickly, but I love to add my own creative touches too. Here's what I came up with.


There are just a few rules for our contest. Make a layout using Debbie's awesome sketch as inspiration. You can flip it, turn it, mirror image it... just use the sketch to inspire your layout. Finish your project and e-mail the image (less than 500 kb please)to us by Sunday, September 19th at midnight Eastern time. We will choose a winner soon after. Send it to allyscraps@gmail.com. Love this cute prize, a lovely BIG card making kit by We R Memory Keepers just in time for fall. The Maple Grove collection, it's awesome!


Well, have fun making layouts, and good luck!! Oh, and be sure to scroll down to see some awesome new projects from Melissa Phillips, Cari Fennell and Roree Rumph. I will be away scrapping for the weekend, BUT, I will be back on Monday with more amazing projects. Stay tuned. :) Dana

Wednesday, September 15, 2010

Creepy, Crawly, Spooky Cards and Pocket

Wow, wow, wow, love this adorable Halloween card project by Melissa Phillips!! Get started on it NOW, and you'll be far ahead on your to-do list for Halloween. :)


Instructions:
1. For the pocket to hold your card set, cut a block of black paper with stars slightly smaller than the front of the envelope and adhere.
2. Cut a 2 ¼” strip of zig zag orange paper to fit across front of envelope and adhere in place.
3. Thread black ribbon through metal grommets on pendant, wrap it around the envelope, and then tie in a large bow on the left to secure it to the front of the pocket.
4. Embellish pendant with alphabet stickers and pendant stickers to spell out “cards”, a single black glittered chipboard pumpkin Thicker, and rubons.
5. Embellish the bottom point of the pendant with cream buttons.
6. Embellish the top flap on the envelope with Thickers chipboard and orange jewel.
7. For the cards, cut assorted cardstock into pieces that measure 8 ½ x 3”. Fold each in half.
8. Cut coordinating paper to fit along bottom edge of each card that measure 2” wide. Adhere in place.
9. Embellish each card with a Thicker placed just above the patterned paper and jewels.
10. Wrap coordinating ribbon in orange and shades of purple around each card just above the paper and knot or tie in a bow to finish.
11. Stuff your cute pocket full of your handmade cards and present to a special friend.


Supplies:
Melissa Frances Large Envelope & Tag Book
American Crafts Halloween Collection – Thickers, Hocus Pocus
American Crafts Halloween Collection - Costume Party
American Crafts Halloween Collection – Magic Spells
American Crafts Halloween Collection – Charms
American Crafts Halloween Collection – Boogie Man
Maya Road - Canvas Pendant Banner Album
Echo Park Paper Walk in the Park Collection – 12x12 Flutter Paper
Echo Park Paper Walk in the Park Collection – 12x12 Sticker Alphabet
Little Yellow Bicycle - Trick or Treat Collection Jewel Stickers


Thanks so much Melissa! You know, you could alter this project for any holiday, and with Christmas coming up, how cute would that pocket be filled with Christmas cards?! Check out Melissa's blog, for even more awesome projects!

~ Dana

Monday, September 13, 2010

A big AllyScraps welcome to Cari Fennell!

It's my pleasure to welcome one of my very best scrappy friends, Cari Fennell, to AllyScraps as a brand new designer to our family! Cari and I live in the same town, and have been great friends for years. I'm so excited to have Cari here. I'll let her introduce herself.


"My husband and I live in Upstate NY with our two sweet boys and beloved lab, Cassidy. I have been scrapbooking for about 8 years now and my style has continued to evolve over the years since I started. This hobby is one of the best things I have ever discovered. I have been involved with Prima Marketing for almost 5 years now. I am currently the Live with Prima Coordinator for Prima's online live class program and I also work the trade shows twice a year. I also travel all over to teach scrapbooking classes, make and takes and demonstrations for special events. Check out my blog meandmymaryjanes to see what I've been up to. I am so excited to be guest designing for Ally Scraps, this is such a gem of a site!"

Cari's first project is so darn cute. I mini album titled "a sweet story". A perfect album to showcase your pictures or as an awesome gift too. Take a look.


The front cover:
Add flower sticker strip on the left side of the cover. I used a piece of old music paper as my base, I cut a square piece 5 x 5 inches, and adhered it with Fabri Tac. I punched out a large scalloped circle using my Marvy Giga punch-from blue with green dotted paper and adhered it to the left corner of my grouping. Punch out a 2 inch square from yellow patterend paper, cut on half diagonally to create a corners. Cut a rectangle from green paper, adhere to center of the cover with yellow corners. Fold down top right corner of green paper and tuck in two pins with a bow and charm attached. Add stickers on lower left corner and a circle tag at the top of green paper for the letter "a". Add letter stickers for your title.


First page: Cover with green animal paper, Tie a bow around the journal card with a little charm and adhere to the page. Tuck in some flowers around the journal card, and add pins behind the flowers.


Second page: Cover with cream patterend paper. Add sticker tabs at the top and bottom of the page (to the left). Adhere journal card, add pin with bow and flower sticker around the card. Add gems to the flower center and tab.
3rd page: Cover page with blue flowered pattern paper, add sheep sticker to right side of the page and add journal card over the sticker. Tuck in some flowers around the card with a sticker tab. Add pearls to flower centers.


4th page: Cover the page with Veggie patterned paper, add journal card to the center. Place sticker to left and bottom of the journal card and tuck in some pins at the top left of the card.
5th page: Canvas pocket-add flower sticker strip across the page and then add sentiment sticker at the bottom, stapling both ends with a Tiny Attacher.


6th page: Other side of canvas pocket-add journal card to the center of the page, Add round sticker to lower left corner with sentiment sticker and a sticker tab at the top.
7th page: Cover page with red gingham patterned paper, tie ribbon around the whole page and finish off with a bow. Add journal card to the left side of the page and adhere flowers around the card. Add button to flower center with a gem, add pins behind the flowers and add a sticker tab on the side of the page.


8th page: Cover with blur dotted pattern paper, adhere journal card and add flowers around the card. Adhered buttons to flower centers.
9th page: Second canvas pocket page-adhere sticker strip along the bottom of the page. Staple both ends with tiny attacher. Add stickers to right side of the page overlapping one another slightly.


10th page: Adhere two flowers and flower sticker to the page, lining them up with the flower sticker so they fit behind the flower images. Add sticker at the top left of the page.
11th page: Cover page with plaid patterned paper. Take the green sticker border, adhere it to the right side of the card. Start at the bottom of the card, and fold the sticker over the top of the card, and adhere to the back of itself. So the sticker with line up on both sides of the journal card.
Adhere journal card to the right of the page. Add flower sticker and more pins tucked behind the card.


12th page: Cover page with yellow dotted paper. Adhere the pig sticker to right side of the page. Add journal card and adhere flowers around the card. Tuck in a pin with a bow behind the top left flower and add buttons to flower centers. Add a sticker tab to the bottom left of the page.
Then to finish it off, I added a large grosgrain brown ribbon around the binding of the book and tied it into a big bow on the outside.


Supplies
Farm Fresh by October Afternoon
Patterned papers
journal Cards
sticker shapes
sticker words
Maya Road
trinket beads
trinket pins, leaves
canvas pocket binder album

Thanks SO much Cari, we're really looking forward to seeing what you do next!!! Have a great week, Dana