Wednesday, March 30, 2011

smile.

Don't these cards make you want to smile? :) Roree Rumph is back with her final March project for Ally Scraps, these two super cute cards. As always, such beautiful details and lovely hand cut shapes.


Congrats
1. Make a 4 x 5 3/4" card from a coordinating cardstock.
2. Cover the card front with the Fabric Store patterned paper.
3. Cut the Borders patterned paper to 3 3/4 x 5 1/2". Distress the edges with a file.
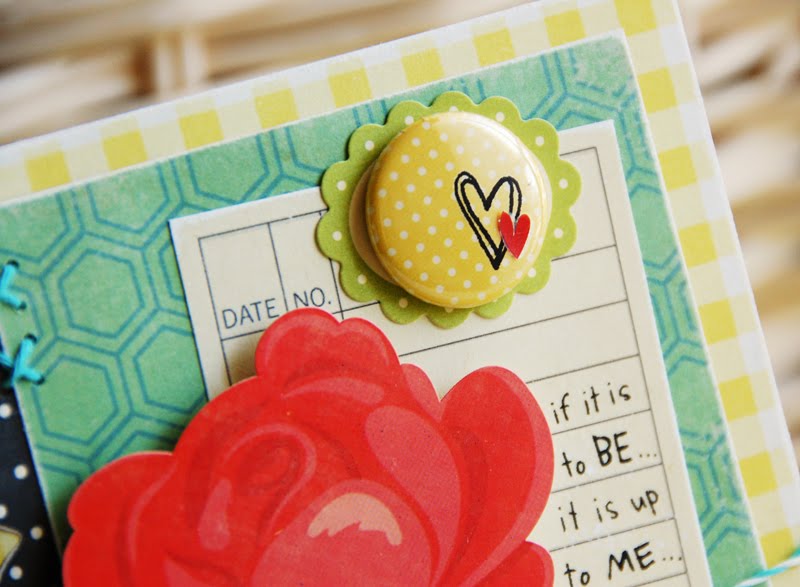
4. For the house, cut out the blue jounaling spot from the Noteworthy patterned paper to 2 x 2 1/2", a 1 x 3/4" rectangle from the Vintage Linen patterned paper, and a large triangle (about 1 5/8 x 3 1/4") from the Advertisement patterned paper. Distress the edges, and layer and adhere them to the panel.
5. Cut out six 3/4" long strips of paper and a 3" circle from the Lace Stripes. Distress the edges with a file. Adhere the strips at the corner of the panel, and adhere the circle over the strips. Trim off the excess patterned paper.
6. Apply the 'congrats' sticker to the panel.
7. Add decorative stitching to the sun, 'congrats' sticker, and grass line with yellow, red and green embroidery thread.
8. Cut out two hearts (with a die-cut machine or by hand) from the Tablecloth patterned paper. Distress the edges with a file, and adhere the hearts to the house shape.
9. Flatten the center of the flower, and adhere it to the panel. Apply the 'home sweet home' Tin Pin to the center of the flower. Thread a small red button with blue embroidery thread, and adhere the button to the Tin Pin.
10. Adhere the finished panel to the card.


Smile
1. Make a 5 1/2 x 4" card from a coordinating cardstock.
2. Cover the card front with the Lace Stripes patterned paper. Distress the edges with a file.
3. Cut out the white journaling spot from the Noteworthy patterned paper. Distress the edges with a file.
4. Cut out two 3 1/4" long strips for the stems and four leaf shapes from the Fabric Store patterned paper. Adhere the pieces to the panel.
5. Flatten the center of the two flowers, and adhere them to the panel. Attach a red button to the center of each with blue embroidery thread.
6. Apply the 'smile' sticker to the card.
7. Add decorative stitching along the bottom for the grass line, and to the 'smile' sticker.
8. Adhere the finished panel to the card.


Supplies
Echo Park Paper For The Record Collection, Tablecloth
Echo Park Paper For The Record Collection, Advertisement
Echo Park Paper For The Record Collection, Fabric Store
Echo Park Paper For The Record Collection, Vintage Linen
Echo Park Paper For The Record Collection, Lace Stripes
Echo Park Paper For The Record Collection, Borders
Echo Park Paper For The Record Collection, Noteworthy
Echo Park Paper For The Record Collection, Alpha Sticker
Studio Calico Elementary Collection, Vintage Pattern Flowers
Jenni Bowlin Collection, Vintage Style Sew-On Buttons, Red
October Afternoon Modern Homemaker Collection, Tin Pins
Other supplies
Cardstock, Buttons, embroidery thread

Thank you Roree, for being with us in March, we just LOVE your projects. Be sure to check out Roree's blog for even more inspiration, and check back here in May, when Roree will again be an Ally Scraps guest designer!

Hey, are you wondering about our next sketch contest?? All the details, the amazing sketch by Debbie Gaydos and the awesome prize will be posted this Saturday. Have a great week. :) Dana

Sunday, March 27, 2011

March sketch winner, revealed!

A BIG Ally Scraps congrats goes out to Jennifer Chapin! She's the winner of our March sketch contest. We are always so lucky to have so many beautiful entries in the contest, and this month was a really tough one to judge. Here is Jennifer's awesome layout, check out the super cool stitching. :)


Here is the original sketch by Debbie Gaydos.


Loving the prize this month, a prize pack of lovely products by Maya Road.


Since I know that you're all BIG Debbie Gaydos sketch fans, here's a BONUS sketch just for you.


Oh, and please leave me a message in the comments about what kind of sketches you'd like to see in the future. Single photo, multi photo, double page, single page, etc. It would be great to have your input, before I put in my "sketch order" for the next few months. :) Have a great day! Dana

Wednesday, March 23, 2011

Celebrate Every Day!

Roree Rumph is back with us, and she's brought along this beautiful mini-book. I'm always so thankful for her wonderful inspiration AND amazing instructions. Hope you'll get busy making one too. :)


Instructions
Cover
1. Paint the back side of the chipboard tag with off-white acrylic paint, and let dry.
2. Trace the shape of the chipboard tag on the backside of the Picket Fence patterned paper, and cut it out. Distress the edges with a file.
3. Cut the Newsprint patterned paper to 2 3/4 x 2". Distress the edges with a file, and adhere the panel to the tag shape.
4. Apply the flourish cardstock sticker from the Elements Sticker sheet, placing pop dots under the leaf shapes to add dimension.
5. Apply the 'celebrate' sticker, rub-on, and letter stickers to the black label for the title to the tag panel. Hand sew decorative stitches to the letter stickers with blue embroidery thread.
6. Dry brush two corrugated button shapes with yellow acrylic paint, and let dry.
7. Attach a red button to the center of each corrugated button with hemp cord and knot. Trim the ends, and adhere the buttons to the tag panel.
8. Adhere the finished panel to the chipboard tag.


Page One (Live)
1. Paint the back side of the chipboard tag with off-white acrylic paint, and let dry.
2. Trace the shape of the chipboard tag on the backside of the Apron Strings patterned paper, and cut it out. Distress the edges with a file.
3. Adhere the black border sticker from the Element Sticker sheet, and trim the ends.
4. Cut the Newsprint patterned paper to 2 3/4 x 3/4". Distress the edges with a file, and adhere the strip to the tag panel.
5. Adhere the photo and number 1 sticker to the tag panel.
6. Adhere the letter stickers to the tag panel.
7. Stamp the rest of the saying onto the Vintage Linen patterned paper with the Alphabet Stamps set and black ink pad. Cut out the individual words, and distress the edges with a file. Adhere the words to the tag panel.
8. Hand sew decorative stitches to the letter stickers and stamped words with blue embroidery thread.
9. Dry brush a corrugated button shape with yellow acrylic paint, and let dry.
10. Hand cut two leaf shapes from the Picket Fence patterned paper. Layer and adhere the shapes to the tag panel.
11. Attach a red button to the center of the corrugated button with hemp cord and knot. Trim the ends, and adhere the button to the tag panel.
12. Adhere the finished panel to the chipboard tag.


Page Two (Laugh)
1. Paint the back side of the chipboard tag with off-white acrylic paint, and let dry.
2. Trace the shape of the chipboard tag on the backside of the Vintage Linen patterned paper, and cut it out. Distress the edges with a file.
3. Adhere the black border sticker from the Element Sticker sheet, and trim the ends.
4. Cut the Newsprint patterned paper to 2 3/4 x 3/4". Distress the edges with a file, and adhere the strip to the tag panel.
5. Adhere the photo and number 2 sticker to the tag panel.
6. Adhere the letter stickers to the tag panel.
7. Stamp the rest of the saying onto the Vintage Linen patterned paper with the Alphabet Stamps set and black ink pad. Cut out the individual words, and distress the edges with a file. Adhere the words to the tag panel.
8. Hand sew decorative stitches to the letter stickers and stamped words with blue embroidery thread.
9. Dry brush a corrugated button shape with yellow acrylic paint, and let dry.
10. Hand cut two leaf shapes from the Picket Fence patterned paper. Layer and adhere the shapes to the tag panel.
11. Attach a red button to the center of the corrugated button with hemp cord and knot. Trim the ends, and adhere the button to the tag panel.
12. Adhere the finished panel to the chipboard tag.


Page Three (Love)
1. Paint the back side of the chipboard tag with off-white acrylic paint, and let dry.
2. Trace the shape of the chipboard tag on the backside of the Picket Fence patterned paper, and cut it out. Distress the edges with a file.
3. Adhere the blue border sticker from the Element Sticker sheet, and trim the ends.
4. Cut the Newsprint patterned paper to 2 3/4 x 3/4". Distress the edges with a file, and adhere the strip to the tag panel.
5. Adhere the photo and number 3 sticker to the tag panel.
6. Adhere the letter stickers to the tag panel.
7. Stamp the rest of the saying onto the Vintage Linen patterned paper with the Alphabet Stamps set and black ink pad. Cut out the individual words, and distress the edges with a file. Adhere the words to the tag panel.
8. Hand sew decorative stitches to the letter stickers and stamped words with blue embroidery thread.
9. Dry brush a corrugated button shape with yellow acrylic paint, and let dry.
10. Hand cut two leaf shapes from the Fabric Store patterned paper. Layer and adhere the shapes to the tag panel.
11. Attach a red button to the center of the corrugated button with hemp cord and knot. Trim the ends, and adhere the button to the tag panel.
12. Adhere the finished panel to the chipboard tag.
To Finish
Attach the finished chipboard tags together with the chain that came the mini album, and tie a bow around the chain with green ribbon. Trim the ends.

Supplies
Echo Park Paper For The Record Collection, Newsprint
Echo Park Paper For The Record Collection, Fabric Store
Echo Park Paper For The Record Collection, Vintage Linen
Echo Park Paper For The Record Collection, Picket Fence
Echo Park Paper For The Record Collection, Apron String
Echo Park Paper For The Record Collection, Element Sticker
Echo Park Paper For The Record Collection, Alpha Sticker
Jenni Bowlin Collection, Vintage Style Sew-On Buttons, Red
Other supplies
Maya Road Tag Mini Album, thickers, corrugated shapes, buttons, embroidery thread, Studio G Alphabet Stamp Set, StazOn Ink Pad (Jet Black), Acrylic Paint (Yellow and Off-White), Ribbon, Hemp Cord

Check out Roree's blog for more awesome projects. Be sure to check back in a few days to see the March sketch contest winner and a bonus sketch from our own Debbie Gaydos. Have a nice evening!

~ Dana

Friday, March 18, 2011

March sketch contest reminder!

Our March sketch contest is under way, and there are only a couple of more days to get in your entry! Hope you're working on yours. Here's the info, first of all Debbie's beautiful sketch.


The prize is an awesome goodie bag of cool products from Maya Road.


I worked on the sketch too, here's my take! (sorry I wasn't able to get a better photo of my layout.) I used pretty, springy papers from Echo Park's Springtime line, it was SO much fun working with this line.


supplies
Echo Park's Springtime Collection
Seasonal Stripe (back)
Floral Fun
Fresh Flowers (back)
Delightful Stripe (back)
Journaling Cards
Alpha Stickers
Element Stickers

Of course, there are a few rules for our sketch contest. Make a layout using Debbie's awesome sketch as inspiration. You can flip it, turn it, mirror image it... just use the sketch to inspire your layout. Finish your project and e-mail the image (less than 500 kb please)to us by Sunday, March 20th at midnight Eastern time. We will choose a winner soon after. Send your layout to allyscraps@gmail.com. Have fun and good luck!

By the way, I would love some input... what would you like to see in our sketch contest? 2 page layouts? single photo layouts? multi-photo layouts?? Let me know, and I bet you might see your requests in future Debbie Gaydos sketches. :) Have a great weekend! Dana

Tuesday, March 15, 2011

On a happy note. :)

Just got back from an awesome weekend of scrappiness! :) I got a record 18 pages done over 3 full days and can't wait to share some of them here on the blog. Roree Rumph has been busy too... and here are the beautiful cards she made to inspire you. So vintage, and lovely and dimensional. Just love them.


Happy Note card
1. Make a 5" square card from yellow cardstock.
2. Cut the Apron Strings patterned paper to 5" square, distress the edges with a file, and adhere the panel to the card front.
3. Cut the Advertisement patterned paper to 4 1/2 x 3/4", scallop along one edge, distress the edges with a file, and adhere the strip to the card about 3/4" in from the left edge.
4. Cut the Borders patterned paper to 4 1/2 x 3 1/2", distress the edges with a file, and adhere the panel to the card over the scalloped patterned paper strip. Hand sew a couple of cross stitches at the corner where the papers meet using a sewing needle and blue embroidery thread.
5. Cut out a journaling spot from the Noteworthy patterned paper, distress the edges with a file, and adhere it to the card.
6. Apply the rub-on quote along the right side of the journaling spot.
7. Wrap the card front a few times with twine, tie a bow, and trim the ends.
8. Apply the "happy" and "note" cardstock stickers, the scalloped cardstock sticker, and the yellow Tin Pin metal badge to the card. Apply the heart rub-ons to the metal badge.
9. Adhere the large rose cardstock sticker to the card using 3-d foam adhesive.


Hello Friend card
1. Make a 5 1/4 x 4" card from yellow cardstock.
2. Cut the Fabric Store patterned paper to 5 1/4 x 4", distress the edges with a file, and adhere the panel to the card front.
3. Cut the Advertisement patterned paper to 1 x 4", scallop along one edge, distress the edges with a file, and adhere the strip to the card about 2" down from the top of the card.
4. Cut out a journaling spot from the Noteworthy patterned paper, distress the edges with a file, and adhere it to the card.
5. Apply the "hello" cardstock sticker and letter stickers to say "friend" on the journaling spot. Hand sew a small stitch on each side of the "hello" sticker using a sewing needle and blue embroidery thread. Apply a small heart rub-on to the "hello" sticker.
6. Wrap the card with the yellow scalloped ribbon, tie a bow, and trim the ends.
7. Adhere the typewriter cardstock sticker to the card with 3-d foam adhesive. Then, adhere the small rose cardstock sticker to the typewriter with 3-d foam adhesive.

Supplies
Echo Park Paper For The Record Collection, Advertisement
Echo Park Paper For The Record Collection, Fabric Store
Echo Park Paper For The Record Collection, Apron String
Echo Park Paper For The Record Collection, Borders
Echo Park Paper For The Record Collection, Noteworthy
Echo Park Paper For The Record Collection, Element Sticker
Echo Park Paper For The Record Collection, Alpha Sticker
October Afternoon Modern Homemaker Collection, Tin Pins
Maya Road Ribbon Yellow Scallop Dot Ribbon
Melissa Frances Transfers, Thankful
Other supplies
twine, heart rub on, embroidery thread

Have you checked out Roree's blog "A house of cards"? There are so many wonderful projects there, be sure to take a look. Thanks so much Roree. :)

See you soon! Dana

Thursday, March 10, 2011

What inspires you??

The other day when I posted Roree Rumph's adorable layout "so silly", I mentioned that I was super inspired by that little embroidered heart on her layout.


Isn't that heart just super sweet?? So, as I started my newest layout, I decided that I wanted to put one on my layout.


Well, that little tiny heart turned into a great big embroidered heart. :)


I used a small part of a layout that I loved the look of, to begin the direction of my project. I know that Roree doesn't mind. (As long as I give her credit of course!) That's why we post her projects (and other designers projects) on our blog. To inspire you!! So, why don't you give it a try? a heart, a flower, a star, a circle... the choices are endless!

Just so you know, I cut a big heart out of vellum, held it on my layout, and used a paper piercer to punch holes all around the heart. It was easy!

Supplies
patterned paper - Kaisercraft Class of 87
assembly
times tables
sports day
excursion
tuck shop
die cut elements
American Crafts marquise thickers

Hey, did you notice that there is loads of brand new stuff in the store?? Including Crate Paper, Cosmo Cricket and Imaginisce?? Also, brands new Thickers!! Love me some thickers. :)

Thanks for stopping by to check out our blog. I'll be scrapping this weekend, hope you will too! Dana

Saturday, March 5, 2011

So Silly.

We are always so thrilled to have Roree Rumph back at Ally Scraps. :) Her amazing designs always make me smile. Know what I love best about this layout? that really cool embroidered red heart, I need to add one of those to an upcoming layout of mine. I also really like the creative way she used the green paper. Really cute!


Instructions
1. Cut the Newsprint patterned paper to 11 x 8 1/2".
2. Cut out green patterned paper strips from the Borders patterned paper (B-side). Cut the strips into varying lengths, and adhere the strips to the layout.
3. Adhere the photo(s) to the layout.
4. Place a heart shaped die-cut on the layout (I used a Heidi Swapp acrylic heart I had), use a paper piercer to mark the shape, then hand stitch the shape with red embroidery thread.
5. Add letter stickers to the stitched heart and above the row of photos for the title.
6. Sew a small red button between the u and r in the title with black embroidery thread.
7. Adhere the ticket journaling spot from the Noteworthy patterned paper to the upper left corner over the green patterned paper strip, and trim off the excess.
8. Cut the black scallop border sticker in half, and adhere the strips to the top and bottom of the layout.
9. Adhere the Note sticker and Tin Pin metal badge to the journaling spot.
10. Stamp your journaling onto strips of Newsprint patterned paper, apply a rub-on heart to one of the strips, and adhere the strips to a Mini Bag & Tag. Wrap another Mini Bag and Tag with twine, tie a bow, and trim the ends. Adhere the bags to the layout.
11. Add two Trinket Pins to each tag, and adhere them to the back of the tag.


Supplies
Echo Park Paper For The Record Collection, Newsprint
Echo Park Paper For The Record Collection, Borders
Echo Park Paper For The Record Collection, Noteworthy
Echo Park Paper For The Record Collection, Element Sticker
Echo Park Paper For The Record Collection, Alpha Sticker
Melissa Frances Paper Bags & Tags
October Afternoon Modern Homemaker Collection, Tin Pins
Maya Road Trinket Pins
Other supplies
Thickers, Soiree Twine, red button, alphabet stamp set, heart rub-on

Thanks so much for stopping by. See you soon, with more fab projects. :)

Wednesday, March 2, 2011

March Sketch Contest!!

It's time for the March Sketch Contest here at Ally Scraps. :) We are always so fortunate to have beautiful sketches by Debbie Gaydos. Her sketches are the best in the business, and I am especially loving this one.


As usual, Cathy has give us an awesome prize. This month it's a wonderful goodie package full of products from Maya Road. We know you'll love this prize!


Of course, there are a few rules for our sketch contest. Make a layout using Debbie's awesome sketch as inspiration. You can flip it, turn it, mirror image it... just use the sketch to inspire your layout. Finish your project and e-mail the image (less than 500 kb please)to us by Sunday, March 20th at midnight Eastern time. We will choose a winner soon after. Send your layout to allyscraps@gmail.com. Have fun and good luck!

~ Dana