paper
ruler
pen or pencil
hole punch
Xacto or craft knife

On the backside of your paper, mark every 1/2 inch about 1/4 inch from the edge--you can make it more than 1/4 inch if you want.

After marking the paper, use your hole punch to make holes where the dots are. You can use a standard office hole punch, or a smaller hole punch (like I used)--it's completely up to you!!

Once your holes are made, use your craft knife to make "slits" in the paper from the hole to the edge--make sure it's a narrow cut--

Once this is done, turn the paper over and distress the edges with an ink pad if you want--take your finger and lift some of the edges up to make it have a bit of dimension--

There you have it! A simple, fun way to make your own "notebook edged" paper!!
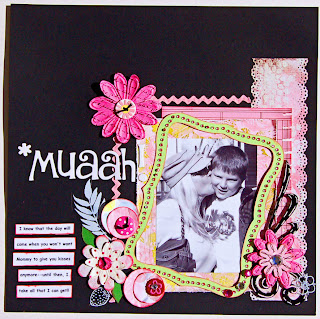
Another fun way to add some extra "oomph" to your pages is to add a little bling to your frames on your layouts--here is a frame I cut from cardstock with my Cricut and added some Glitz Icing around the edges--it just adds a bit more fun to your layout!!

Here is my completed layout that I did using these techniques:


Now go have fun and be sure to post your layout in the gallery!!
~~Kary

Kary your work is always so awesome!! Thanks for the techniques.
ReplyDeleteGreat tips Kary. Love your layout (and that title rocks)!
ReplyDelete