Sunday, March 29, 2009

March Design Team Reveal - SPRING!

We're feeling "springy" over at AllyScraps! Spring weather, spring pictures and lots of awesome spring products to highlight. We all created a special spring themed layout, and we can't wait to share them with you... here they are.

Raechelle
Rae's layout is SO colorful and the title really captures my attention. Love the letters in different colors! I'm going to have to try that. She used American Crafts Vinyl thickers for the title, super cute. This paper is the perfect spring paper, it's the My Mind's Eye Bloom and Grow collection, fun cut out flowers too. Thanks for sharing Rae, and awesome job.


Chris
Chris did a super cute Easter layout layout too. She also used vinyl American Crafts thickers in the poolside font. And the adorable Imaginisce Twitterpated paper and embellishment line to highlight her photos. Love the design and fun spring look! Awesome job Chris.


Morag
I really enjoy Morag's super cool use of handcut embellies and shaped paper. They really make this sweet picture of her son pop off the page. She used the really pretty Scribble Scrabble Evelyn papers and die cuts for her cute page. The alphabet is fun and glittery, American Crafts thickers of course. So pretty Morag, thanks for sharing!


Debbie
Debbie used Pebbles Inc.'s Hometown Collection for her spring layout. Aren't these planting pictures of her family the very best? I love the interaction between the boys and their Dad. The design is really cool, love the fun edges, and the super cool stamping. Love your layout Debbie.


Dana
My layout captures one of our favorite family traditions, Marissa's Easter basket hunt. I love the Easter Line from Pebbles Inc. fun colors, pretty patterns, and super stickers. They helped me put together a simple layout, that really shows the season, and the happiness on Marissa's face. Thanks for taking a look.


Well, I hope you've found some inspiration from our Spring layout! Thanks for stopping by, happy Spring!

~ Dana

Sunday, March 22, 2009

Ribbon storage idea


Do you have an over abundance of ribbon? Do you struggle with creative and space saving ways to store it? Do you forget what you have on hand? If you answered yes to any of these, then you my friend are in luck. I found an inexpensive and easy way to store my ribbon, where I can see what I have and it doesn't take up precious storage space on my shelves. I'll be honest, at first when I tried this I wasn't sure if I was going to like it, however after having it up for a week and being able to quickly look through my ribbon, I have come to really like having it hanging beside my work space. What used to take several minutes, now takes just seconds and I am not left with a mess of ribbon to clean up.

What you need:
-an embroidery hoop (I used a large one that I had on hand, but any size will do. If you have a lot of long ribbon strips, then I suggest using a large hoop.)
- 4 pieces of twine (or ribbon) about 12" in length (depending on how high or low you want this to hang you will need to adjust the length accordingly)
- your long ribbon strips
- about an hour of time

How to:
This is very simple. All you need to do is tie each piece of 12" twine onto the emroidery hoop in 4 equal spaces. If you view it like a clock they would tie at 12, 3, 6 and 9.
Once you have tied them all to the hoop, gather them all at the top and tie into a knot, forming a loop in which to hang it by. Once this is done, hang it and tie the ribbon pieces over the hoop by looping them through so you can easily remove them. (I did mine according to pattern and style.)

That's it. :)


Friday, March 20, 2009

Friday's Purrrfect Project

TGIF! How about something to do over the weekend?

If you are like me, then you have a whole collection of gorgeous ribbons and trimmings. They come in a whole variety of textures and colours and they can add that perfect finishing touch to a project.

So this week's prompt is to combine ribbons into your project. You can make anything as long as it is not a tradtional scrapbook page. For example a tags, cards, home decor, mini book anything goes!

This week, the team have come up with some cracking samples (as always).

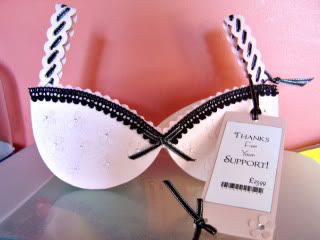
Firstly, Vee has made this fabulous bra card! She's even included a shopping tag which says "Thanks for your Support" complete with price and barcode.

Photobucket

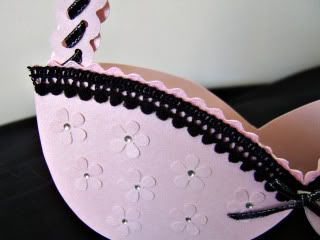
I love the flower detail and the ribbon threaded through the straps and trimming around the cups. Such a novel card, who knows where she gets her fantastic ideas from?!

Photobucket

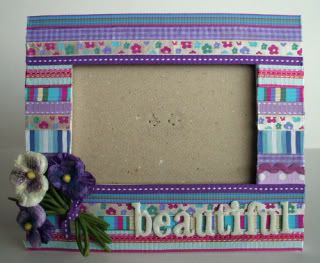
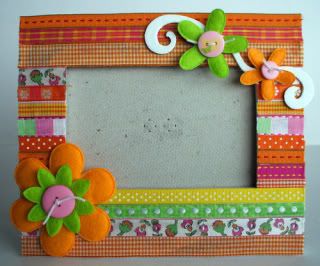
Rae has really gone to town with some ribbon left overs making some stunning picture frames.

Photobucket

I love the colours and striking embellishments. She has managed to pull together the bright colours and patterns pefectly.

Photobucket

I have taken a cheese triangle box (which was just asking to be altered) and created a mini-album.

Photobucket

Using circle pages, they have been joined together with ribbons for a super-easy accordian album.

Photobucket

As we celebrate Mother's Day this weekend in the UK, it would make an excellent gift with a matching card.

Photobucket

So why not get out your ribbons this week to make a project? We'd love to see what you can do, so don't forget to upload to the gallery.

Thanks for dropping in

Morag & The Purrrfect Projects Team x

Tuesday, March 17, 2009

Using Seasonal Products out of Season


When I saw these stamps on Sale the other day, I just had to have them. But who could wait until Christmas to use them?

We've been fortunate enough to have some snow here recently (a real novelty). I had loads of lovely photos to scrap and the stamps proved to be a perfect accent.


Those of you that know me, know that I adore My Mind's Eye. The new Penny Lane papers are no exception. They are simply gorgeous IRL.


The papers were so pretty, I had a hard time cutting them - you know how it goes! I cut out some of the circular flowers from Graceful Circles paper and arranged them with some circle frames.


Did you notice the gorgeous chipboard button from Jenni Bowlin? How cute it that?!

By layering the die cut frame behind my photo, I was able to place my cute little winter characters as a focus.


The stamps create beautiful, crisp images, which I've coloured in with watercolour pencils, before cutting them out. Add a little snow and glitter, they make perfect winter friends!

So why not try reassigning some of those seasonal items to other layouts?

Thanks for dropping by.

Morag x

Friday, March 6, 2009

Purrfect Projects #5

Baby girl is our theme for this weeks Purrfect Projects. The team has created some beautiful and creative items.
Rita has created some cute floral hair bands with flowers from her stash and they can be stored in this darling bird container:


Vee created a beautiful and sweet little book of rhymes:


Morag made this adorable Hello Kitty gift bag:

Lee Ann made her niece some wonderful personalized baby cards and a special lullaby CD:


Raechelle created a girly bucket and card gift set:
The store is full of wonderful baby girl items. Head on over and take a peek!
We hope that we've inspired you to get out your supplies and take them to a whole new dimension. We'd love to see what you do so why not upload to our gallery?
Raechelle, Morag & the Purrrfect Project Team

Tuesday, March 3, 2009

Welcome Spring!!

I don't know about you, but I am so ready for spring!! If you are itching to see tulips and daffodils, then I have just the project to get you ready.

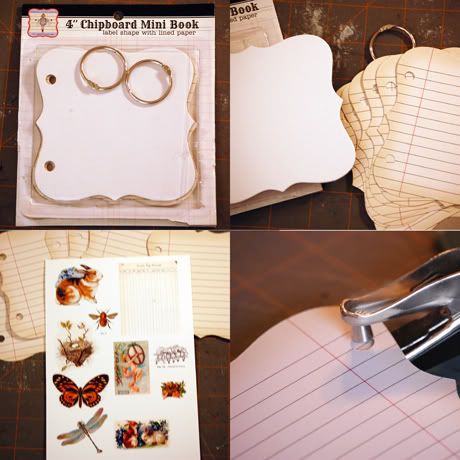
As my base for my spring banner, I used a Jenni Bowlin Chipboard Label Shape Mini book, found here in the Ally Scraps store.

It comes with 8 sheets, plus the chipboard covers. I used 6 of the sheets to make my banner. I liked the look of the notebook paper, so I went with that. (Bonus, you can use the other sheets for journaling on a layout!)

I went online and found some gorgeous Victorian Era images on The Vintage Moth blog. She has a lot of great old pictures, and they are all free. I printed those out on matte paper.

I first punched 2 additional holes on the side that didn't have any. I just flipped one of the pages over and lined it up to use as my guide. (You'll need the holes to put the banner together later.)

assembly

Next, I used ColorBox Eye Fluid Chalk inks in Pink Pastel and Warm Violet to ink the edges. I alternated the colors, one pink, one purple.

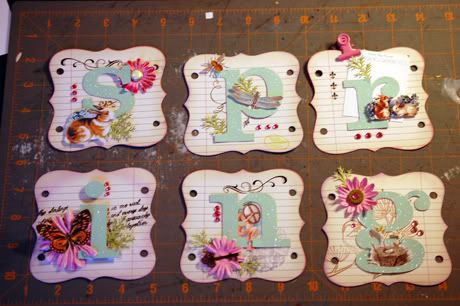
From a pre-glitter sticker paper, I used my Silhouette die cut machine to cut out 2" high letters that spelled "spring". You could also spell out Easter... they both have 6 letters. If you have chipboard letters handy, you could use those.

I then just pulled out a bunch of supplies, rubons, stamps, flowers, bling... whatever you would like to add.

I hand cut out the vintage illustrations, and assembled everything before I glued it down.
spring 1

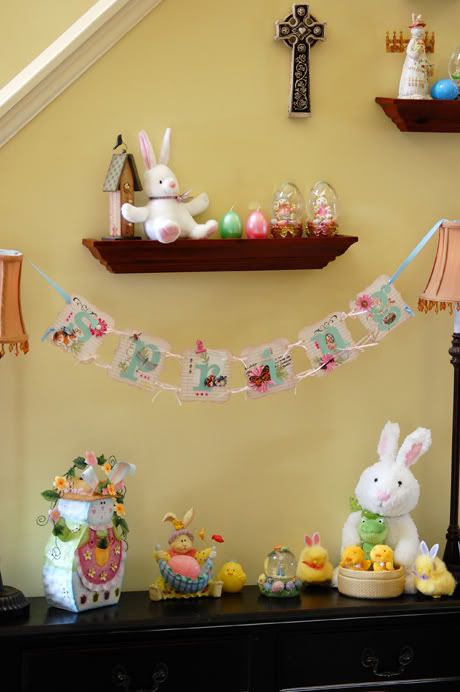
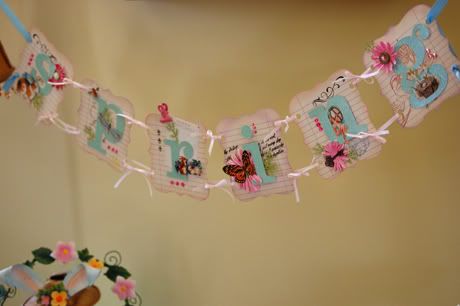
Once everything was glued and dry, I used ribbon to attach each piece together to form a banner. I hung it up in my foyer with my Easter decorations. I love how it turned out. This would look great on a mantel, too.

banner 1

banner 2

I hope you enjoyed my banner and that it inspires you to create something springy. We'd love to see your creations in the Ally Scraps Gallery.

~ Chris