Showing posts with label Stamping. Show all posts

Tuesday, March 17, 2009

Using Seasonal Products out of Season


When I saw these stamps on Sale the other day, I just had to have them. But who could wait until Christmas to use them?

We've been fortunate enough to have some snow here recently (a real novelty). I had loads of lovely photos to scrap and the stamps proved to be a perfect accent.


Those of you that know me, know that I adore My Mind's Eye. The new Penny Lane papers are no exception. They are simply gorgeous IRL.


The papers were so pretty, I had a hard time cutting them - you know how it goes! I cut out some of the circular flowers from Graceful Circles paper and arranged them with some circle frames.


Did you notice the gorgeous chipboard button from Jenni Bowlin? How cute it that?!

By layering the die cut frame behind my photo, I was able to place my cute little winter characters as a focus.


The stamps create beautiful, crisp images, which I've coloured in with watercolour pencils, before cutting them out. Add a little snow and glitter, they make perfect winter friends!

So why not try reassigning some of those seasonal items to other layouts?

Thanks for dropping by.

Morag x

Thursday, October 23, 2008

Customising Accessories

AllyScraps Next Top Scrapbooker is in its last week. It was my turn for the challenge - customise your accessories (or accents).

I love to customise my products - makes them feel a little more unique. One of my favourite techniques is stamping on my accents such a blossoms or chipboard. It's really simple to do and can really alter the look of your product with very little cost and effort.


For my title, Proof, I want to give the letters a little printed text but I just want little scraps of text. I've rearranged the letters so that when assembled, the text will be jumbled up.

I've selected a text stamp and pigment ink for stamping. Ink up the stamp in a random fashion so that not all the text is covered.


Stamp your letters as normal, you may need to stamp again if some areas are left blank. There's no need to re-ink in between - this just adds to the distressed look.


Hey Presto! Customised letters.


I used the same method to customise my Gerbera before folding in half and layering with net and a button.


We can use the same technique with buttons (use solvent ink such as Staz-on), ribbon, cardstock and paper.


To further customise this layout, I've doodled around the patterned papers, letter and photos to add a little emphasis.

I hope that you'll try customising your products. We'd love to see what you do. Just upload your layouts or projects to the AllyScraps Gallery

Thanks for stopping by. Happy Scrapping!

- Morag x

Wednesday, September 24, 2008

More from your Stamps

I have to admit I'm a little biased because I love stamps. They are so versatile and can be just used again and again.

I was asked recently about some watercoloured images I had made and thought it might be fun to do a small 'how to'. Now, I'm no expert but this works for me!

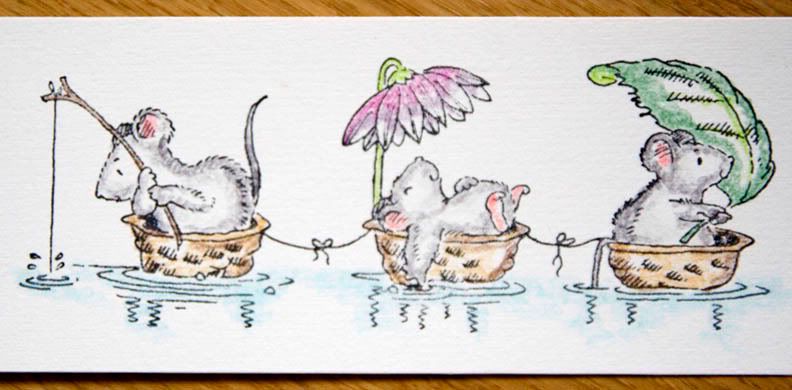
I have just recently discovered watercolouring images and it's like being a kid again! I've used watercolour pencils because they are so simple to use and really doesn't require any expertise.


Stamp you image in a solvent based ink such as Staz-on. Watercolour paper is best but any heavy cardstock paper will do.


I start by going around the edges of my image with my pencil. Use the main colour first, add shadow colours or highlights next. Try to imagine where the highlights and low lights of the image would be for a more realistic effect.

Tip: I use small circular movements to prevent pencil marks later but you'll need to experiment with your pencils.


Now for the fun bit. Dip your paintbrush in the water and draw off any excess - you brush should be very damp rather than soaking wet. You can always add more.


Draw your brush from the edges towards the centre to 'pull' the colour. You may need to make more than one pass to get the effect that you want.


Allow the paper to dry before adding more detail such as rosy cheeks or pink tummys.


To make the card, I used some patterned paper from Depot Park from October Afternoon. Add a decorative edge and secure a ribbon along the bottom.


Voila! A beautiful card in about half an hour!

There are literally hundreds of beautiful stamps and the latest from Hero arts can be found here.


Happy stamping!

Morag x

Saturday, September 20, 2008

Looking for just that perfect embellishment?

Who doesn't love finding that just perfect ready-to-stick-on-the-page embellishment? I know I do! But sometimes, what you have in your stash just isn't quite what you're looking for. So why not turn to those neglected stamps (come on, I know you have them!) and create something one-of-a-kind that suits your needs perfectly!

For my page "a quiet moment shared", I used several different stamp sets to add interest to my page, and give it just the extra personal touch that I was looking for and couldn't quite find in my usual stash of embellishments.


The page features the gorgeous papers and die-cuts of the October Afternoon "Hometown" line. I really liked the little index tab die-cut, and thought it would be perfect with a stamp from the Autumn Leaves Stamped and Coded collection. To give the stamping a crisper and neater look, I used Post-it notes to mask off the printed edges of the die-cut, so that only the white was left visible.


The scalloped circle at the lower corner of the photo includes several stamps and multiple layers. First I punched the large scalloped circle from the blue ledger paper, and stamped it with one of the circle borders from the Kelly Panacci 360 Degrees stamp set. Next, I cut a circle from a scrap of my background cardstock, and stamped it with the "live laugh love" stamp from the same KP set. After adhering these to my page underneath the photo, I added a chipboard heart, covered with the blue ledger paper, and stamped with the "smile" stamp and another circle border from the KP set. Just a bit of the border shows since most of it was off the heart, but that's ok - it's enough to give the sense of another circle border, and the common theme helps to tie the entire stamped embellishment cluster together.


Finally, I wanted to add another layered scalloped circle, with the date, along the page edge. Although the date itself was computer-printed on the paper to match the journaling, I dressed it up with a stamped circle - yet again, another one from the KP 360 Degrees set! This helps to tie together the circle theme throughout the page. Combining your stamps with text or graphics generated from your computer can be a very effective way to create custom embellishments!


And since I was in such a stamp-happy mood, I also added a border with these Kelly Panacci border stamps. They are so pretty, I really love the touch that they added to the page, and how the balance the October Afternoon die-cut border strip at the bottom.

So, are you itching to get out your stamps yet? I hope so! I would love to see what you can come up with when you start stamping away!

- Debbie