If you're like me, you have a small stash of cards ready to send out for various occasions. This is a great way to use up some leftover scrap supplies, and at the same time, have a great card ready when needed for any occasion - one that will usually be much more cherished and appreciated than a card that is store-bought.
But I don't get into "card-making mode" as often as I would like, and as a result, sometimes my stash starts to run low. Especially of the most often needed ones, like Happy Birthday. So, here is a great way to give yourself a push to beef up your card stash! Sit down and go on a mini-cardmaking binge! Grab some scraps from a favorite line, coordinating cardstock, a few of your favorite tools, and your stamps or stickers (or even use your computer for the sentiments). You'll find that you can whip up a number of gorgeous, coordinated cards in no time at all!
For my own private cardmaking party, I pulled out scraps from three awesome lines that I worked with over the past month:
My Mind's Eye Penny Lane - Free Bird,
Pebbles Inc. Downtown, and
3 Bugs in a Rug Snips and Snails. I just love all of these lines, and had some great scraps available after making pages with them. I then pulled out one piece of cardstock that coordinated with each line. Of course, depending on how many scraps you have and how many cards you want to make, you could pull multiple sheets of cardstock to match each line. I picked an orange for the Pebbles Inc, and two different shades of green for the other two.
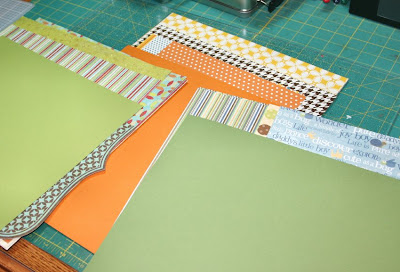
Next, I wanted to work on the cards sort of assembly-line style, so I cut all of my card bases from the cardstock. Since I made all of mine quarter-fold cards, I got 2 cards per 12x12 sheet of cardstock, with some pieces left over that I could use on the cards, if needed. Alternatively, you could get one quarter-fold card plus one 5x6.5 card from a 12x12 piece of cardstock, or two 6x6 cards with no leftover. (Remember though that a 6x6 card requires additional postage if sent via US Mail!).
And now the fun begins! I just went at it, basically doing the cards two at a time - working with each line separately. Cutting, tearing, inking, punching my paper to create a design that I liked on the card base. I added my paper to all six card bases first, and then came back and did all the sentiments at one time. This worked out great and made the process very easy, quick and efficient! I managed to pull out some of those stamps that I just had to have (LOL) but hadn't used yet. After adding the sentiments, I went back and did one last "final touches" pass of all 6 cards. For me, that mostly meant adding brads because I just love 'em! But it could be brads, flowers, buttons - whatever you like!
When I was finished, I had a nice assortment of cards to add to my stash! Here they are.
My Mind's Eye:

3 Bugs:
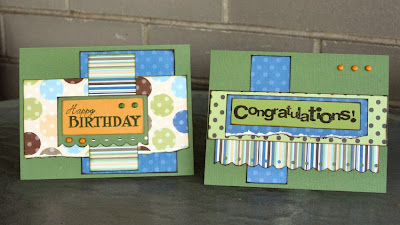
Pebbles Inc:
This was a great way to spend a couple of hours at my scrap table, replenish my cards supply, take a little diversion from making layouts, and juice up the mojo! I'd love to see what you come up with on your card-making binge, so have at it!
-
Debbie


