Paper pleating (or folding) is used often to add a little bit of oomph to a layout or to add a nice finishing touch to a project. The best part is that it's simple and takes just a few extra moments to complete.
For this box project, I used paper pleating to add detail to the sides of the lid.


The first thing I did was cut 2 strips of 12" paper the width of the lip of the lid (which is about an inch). I then sanded the edges, because I wanted a bit of distressing.
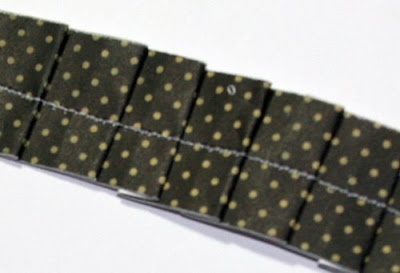
I went on to start my folding. I simply started at one end and began folding small pieces using my right index finger under the paper strip and pushing up a small section toward the end of the strip and then using my left index finger to press a seam on top of the strip. I then moved down the strip in about 1/2" intervals and repeated until the strips were complete. The end result looked like this:

To make it easier to adhere to the lid, I added a single row of stitching down the center:

Once I had adhered it to the lid and it was dry, I gently fluffed out the edges a bit to add a little more dimension.
There is no wrong way to do this, just have fun and enjoy the end result!
Take care,
Raechelle


4 comments:
Thanks for the great tip! I will have to give this a try.
Love your pleating tutorial!! The box looks fantastic!
Love the look of the pleated paper!!!! Thanks for the tutorial!!! :)
What a creative idea! I can't wait to try this out!!
Post a Comment